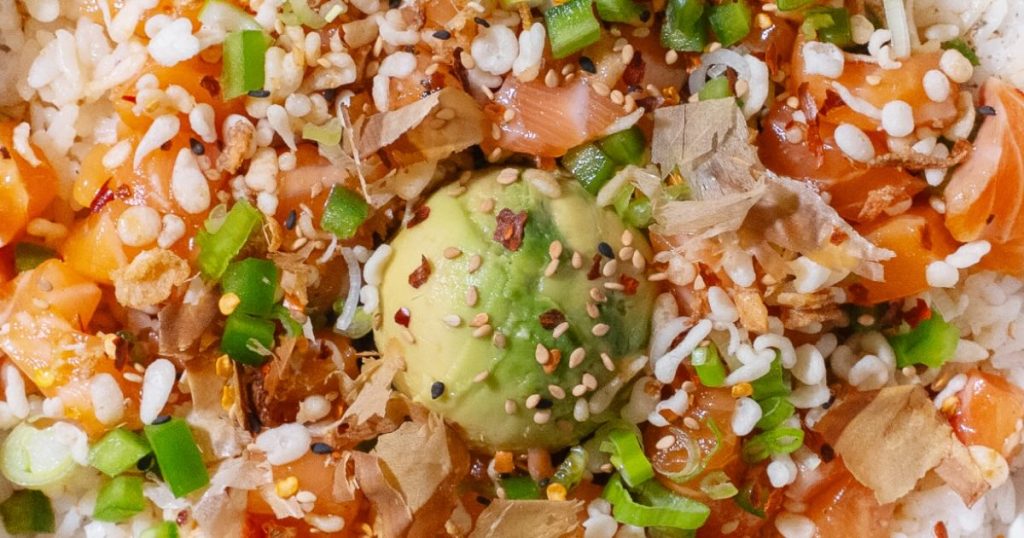
Dans le monde des poké bowls, les projecteurs sont toujours braqués sur la vedette : le poisson de haute qualité, de grade sashimi. Mais demandez à n’importe quel chef, et il vous dira que la véritable base d’une expérience exceptionnelle de poké de style hawaïen est le riz.
Utiliser le mauvais riz peut transformer un repas magnifique en un mélange désordonné et peu appétissant. De nombreux bols faits maison échouent parce qu’ils utilisent du riz à grains longs standard, sans offrir la saveur ni la texture essentielles requises.
Nous expliquons pourquoi l’amidon spécifique et l’assaisonnement du riz japonais à grains courts sont indispensables pour un bol parfait, et nous partageons une technique professionnelle, étape par étape, pour le cuire et l’assaisonner.
Qu’Est-Ce Que Le Riz À Sushi ?
Le terme « riz à sushi » désigne en réalité deux choses : le type de grain et la méthode spécifique utilisée pour l’assaisonner.
1. Le grain : Le riz à sushi est exclusivement une variété de riz japonais à grains courts. Ces grains dodus et ronds sont riches en un type d’amidon appelé amylopectine. Cette forte teneur en amidon est l’élément fonctionnel clé qui rend le riz gluant, bien qu’il ne contienne en réalité aucun gluten. Lors de la cuisson, cet amidon se gélatinise, créant l’adhérence et la cohésion nécessaires.
2. L’assaisonnement : Les grains cuits ne deviennent du riz à sushi qu’après avoir été mélangés avec du vinaigre à sushi (Sushizu). Il s’agit généralement d’un mélange simple et équilibré de vinaigre de riz, de sucre et de sel.
Pourquoi L’Adhérence Est Essentielle Lors De La Cuisson Du Riz À Sushi ?
Le choix du riz à sushi dans les poké bowls n’est pas le fruit du hasard ; c’est une décision culinaire brillante qui garantit l’équilibre et la tenue du plat :
Cohésion Fonctionnelle : L’adhérence est essentielle. Contrairement au riz à grains longs et aéré, le riz à sushi permet aux grains d’adhérer au poisson cru froid et humide, aux sauces et aux garnitures croquantes. Cela garantit que chaque bouchée est parfaitement cohésive, incarnant le véritable esprit du poké à la hawaïenne.
Équilibre des Saveurs et de la Température : L’acidité douce et légèrement aigre issue de l’assaisonnement au vinaigre contrebalance la richesse et le gras du poisson cru, en particulier le saumon. Cela empêche le bol de paraître lourd ou huileux. De plus, servir le riz tiède ou à température ambiante permet d’équilibrer la fraîcheur du poisson et des garnitures, offrant une sensation agréable en bouche.
La Méthode Professionnelle : Cuisson Et Assaisonnement
Maîtriser le riz est un processus en trois étapes. Voici comment cuire le riz à sushi comme un professionnel :
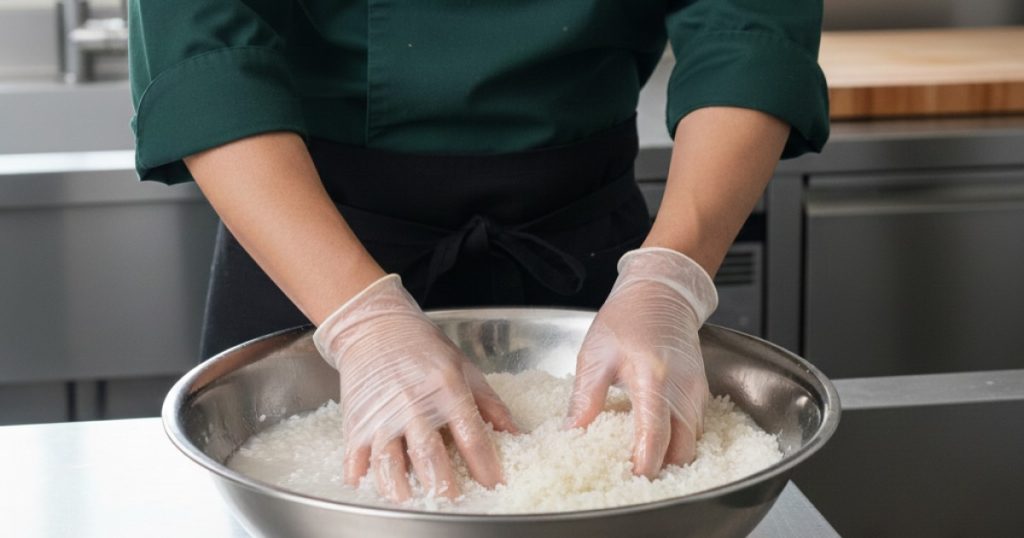
Étape 1 : Lavage Pour La Texture
Avant la cuisson, vous devez rincer vigoureusement le riz (6 à 10 fois) jusqu’à ce que l’eau devienne presque totalement claire.
Cela permet d’éliminer l’excès d’amidon en poudre qui recouvre les grains, ce qui rendrait autrement le riz pâteux ou collant. Le rinçage garantit que les grains cuits soient collants, tout en conservant leur forme individuelle.
Étape 2 : Cuisson Pour L’Épanouissement
Utilisez un ratio de 1:1, en volume, entre le riz et l’eau. Après une cuisson à feu doux pendant 15 à 20 minutes, éteignez le feu et laissez le riz reposer à la vapeur, à couvert, pendant encore 10 à 15 minutes. Ce temps de repos crucial permet aux grains d’absorber entièrement toute l’humidité sans être écrasés.
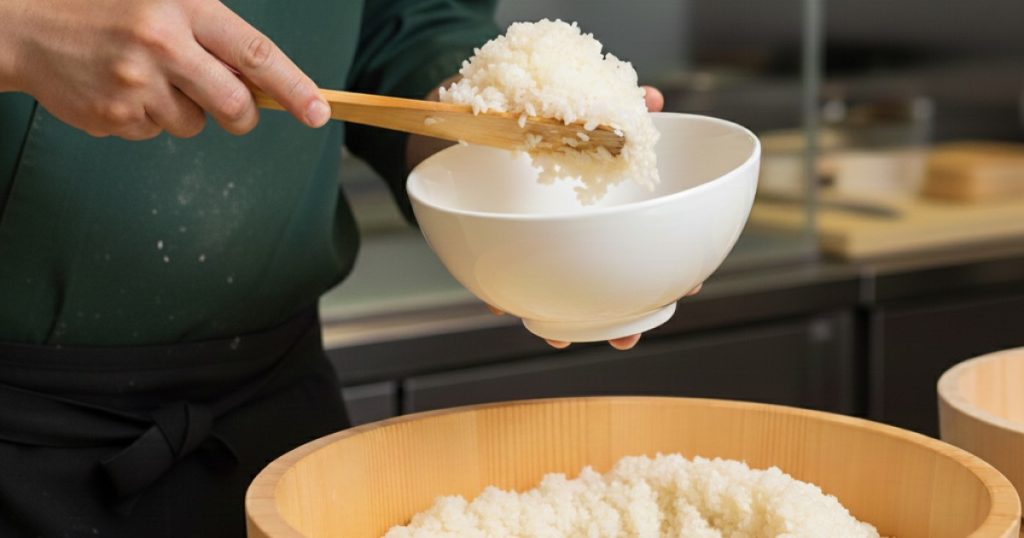
Étape 3 : La technique d’assaisonnement professionnelle
Réchauffez délicatement votre Sushizu (vinaigre de riz, sucre, sel) jusqu’à dissolution des solides, sans le faire bouillir. Transférez le riz chaud dans un grand bol non métallique. Versez l’assaisonnement sur le riz et utilisez une spatule en bois pour l’incorporer par mouvements de coupe ; ne mélangez jamais en remuant. Remuer écrase les grains tendres et libère trop d’amidon.
Conseils De Pro Pour Un Riz À Poké Parfait

Astuce 1 : Le secret du refroidissement : éventez toujours le riz vigoureusement pendant que vous incorporez le Sushizu. Cette étape est essentielle, car un refroidissement rapide crée la brillance caractéristique du riz et stoppe le processus de cuisson, fixant ainsi la texture parfaite.
Astuce 2 : Le repos final : après l’assaisonnement et le refroidissement, couvrez le riz avec un linge humide ou une serviette en papier et laissez-le reposer pendant 10 minutes. Cela permet d’absorber l’excès d’humidité et aux saveurs de bien se mélanger.
Astuce 3 : La bonne température : pour un contraste de saveurs optimal, le riz à sushi doit toujours être servi à température ambiante ou légèrement au-dessus. Servi froid, il perd en acidité et sa texture devient dure.
Conclusion
Maîtriser ce qu’est le riz à sushi et apprendre à le préparer est l’étape la plus importante que vous puissiez franchir pour sublimer vos poke bowls faits maison. L’effort consacré au lavage, à la cuisson et à l’assaisonnement est ce qui transforme un simple repas en une véritable expérience culinaire authentique.
Pour vivre une expérience de riz véritablement préparé par des experts à chaque fois, visitez le meilleur restaurant de poké au Canada, Olu Olu Poké, où la base de chaque bol est réalisée avec un soin professionnel et un profond respect de la tradition.
Foire Aux Questions (FAQ) Sur Le Riz À Poké
1. Puis-je utiliser du riz brun pour mon poké bowl à la place du riz à sushi ?
Bien que vous puissiez le faire, ce ne sera pas authentique. Le riz brun n’est pas assez collant pour maintenir les ingrédients ensemble comme le riz à sushi classique, ce qui rendra le bol plus dispersé.
2. Quelle est la principale différence entre le « riz à sushi » et le riz blanc ordinaire ?
Le riz à sushi est un riz à grains courts, riche en amidon et collant. Le riz ordinaire (comme le Basmati) est pauvre en amidon et plus léger, ce qui ne convient pas bien pour lier les ingrédients des poké bowls.
3. Pourquoi dois-je éventer le riz après l’assaisonnement ?
Éventer le riz permet de le refroidir rapidement, ce qui stoppe le processus de cuisson, évite qu’il devienne pâteux et lui donne son aspect brillant caractéristique ainsi que sa texture parfaite, essentiels pour le poké à la hawaïenne.
4. Le riz doit-il être chaud ou froid lorsque je prépare mon poké bowl ?
Le riz doit être servi à température ambiante ou légèrement tiède. Servi froid, il perd en saveur, et servi chaud, il peut altérer le poisson cru.
5. Puis-je préparer et assaisonner le riz à sushi la veille ?
Non. Le riz à sushi assaisonné sèche et durcit au réfrigérateur. Pour obtenir la meilleure texture et la meilleure saveur, il est préférable de cuire et d’assaisonner le riz le jour même où vous prévoyez de manger le poké.